Computer Graphics OpenGL project
Please note - the information on this page is subject to change until the course starts.
Getting Started: The OpenGL framework
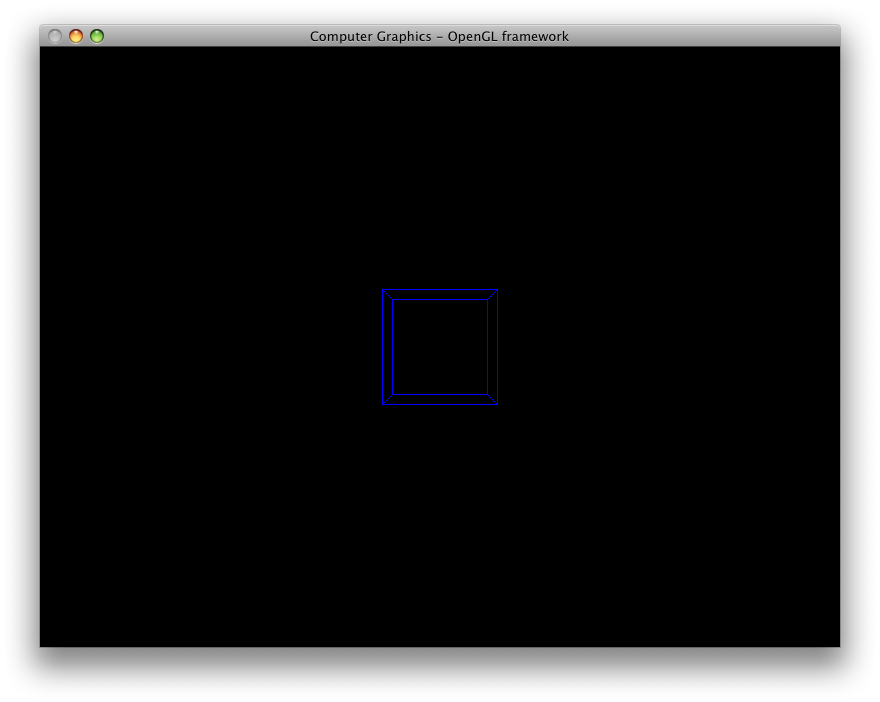
Download the file openglframework.zip. It contains one single source file (openglframework.c) and build files for different platforms (a Makefile for gcc/MingW and a project file for Microsoft Visual Studio 2003). Try to compile and run it. A window showing a wireframe cube should appear (drawn using Vertex Arrays).
On some platforms the GL header files are not updated to OpenGL 2.0. On these platforms it might be convenient to use glew. Currently the framework already uses it by default on Windows (both when using the Makefile with MingW and when using Microsoft Visual Studio).
Compilers
You have access to a variety of compilers
1. Transformations, viewing interaction
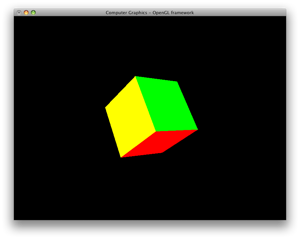
- Replace the wireframe cube with a cube modeled by triangles or quads (using Vertex Arrays or, for bonus points, Vertex Buffer Objects). Let each of the 6 sides have a different color (hint: flat shading is used and that means OpenGL usually selects the color corresponding to the last vertex of a shape to color the shape).
- Add a simple viewing interaction capabilities to your program. The user should be able to rotate the scene and zoom in/out (for example holding ctrl while moving the mouse).
- Read documentation on how to use GLUT's mouse and motion callback functions. To determine the state of keyboard modifier keys like alt and ctrl, you can use the function
glutGetModifiers() (documentation).
- Implement simple rotation interaction. You can use the following procedure as a guideline:
- Using the
mouse() and motion() callback functions you can determine how much the mouse has moved since the last button press.
- Use the difference between the mouse position of the last button press and the current mouse position to obtain two rotation angles (experimentally determine a factor to scale this value).
- First rotate up and then to the sides (or the other way around) to notice the downside of this approach.
- Implement zooming (the easiest way is to use the
fovy argument of the gluPerspective() call).
- (Bonus) Implement a better virtual trackball. You can use this as a starting point, and consider using quaternions.
- (Bonus) Add panning.
- (Bonus) Implement FPS-like interaction (i.e., WASD for navigating, mouse for looking around).
2. Phong shading with GLSL
The OpenGL Shading Language (GLSL) allows for more flexibility in doing computer graphics. In this assignment you will create a very simple shader program that barely scratches the surface of what is possible using GLSL. Note that we will be using GLSL 1.20 (and that different versions of GLSL can differ quite a lot). The computers in room 283 only have OpenGL 2.1, therefore we can use GLSL upto version 1.20.8. See this list on Wikipedia.
Since OpenGL doesn't use "real" Phong shading (it uses a simplified version) you should compare the results of your shader to the raytraced results of last week. To make the OpenGL program draw the same scene as the ray tracer, follow these steps:
- Incorporate the code from raytracer-scene01.c in your program (and don't forget to include
math.h, otherwise this happens).
- Set the initial window size to 400x400 and the shading model to GL_SMOOTH (it is now set to GL_FLAT).
- Make sure there is one light and its position is (-200.0,600.0,1500.0). See chapter 5 of the OpenGL Red Book for more information on how to use OpenGL lighting. Please remember that GL_POSITION is a vector of 4 components.
- For exact correspondence, change the line reading
Point pixel(x, h-1-y, 0); to Point pixel(x+0.5, h-1-y+0.5, 0); in scene.cpp in the ray tracer (this way it samples the center of a pixel).
- Optionally you can improve the rotation you implemented by rotating about the point (200,200,200) (use a glTranslate before and after the rotate).
If all is well your OpenGL output should now look like this:
By following these steps you can add GLSL shader support to your OpenGL program:
- Add the files vertexshader.glsl, fragmentshader.glsl, glslshaders.c and glslshaders.h to your project (remember to add glslshaders.o to OBJS or COBJS in the Makefile).
- Call the function
initGLSLProgram() in the OpenGL initialization part of your program: initGLSLProgram("vertexshader.glsl","fragmentshader.glsl")
If all is correct the spheres should be completely red:
You can now experiment with the values used in the fragment shader to see what kind of effect they have. We will first change the shaders in such a way that instead of just red, the colors will represent the normals (to get a normal buffer):
- Add the line
varying vec3 N; to the top of vertexshader.glsl (prepend "flat" for flat shading).
- Add the line
varying vec3 N; to the top of fragmentshader.glsl (if you prepended flat/smooth, do it here as well).
- In the vertex shader, add
N = gl_NormalMatrix * gl_Normal; to the body of the function.
- In the fragment shader, change the single line found in the body of the function to
gl_FragColor = vec4(0.5*normalize(N)+0.5,1.0);
- Test whether it works.
- Now change in the vertex shader the line with
N = gl_NormalMatrix * gl_Normal; to N = gl_Normal; and run your program again. Notice the difference (in particular when rotating your model). See this explanation for more information on gl_NormalMatrix.
old link: http://www.lighthouse3d.com/opengl/glsl/index.php?normalmatrix|this explanation
old link on archive.org: http://web.archive.org/web/20070315024457/http://www.lighthouse3d.com/opengl/glsl/index.php?normalmatrix
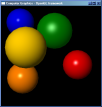
Now that you have your shaders in place, your assignment is to implement Phong shading in the shader, just as you did in the Raytracer assignment. Be aware though whether you do your calcutions in world space or in eye space. If you modified the ray tracer to sample pixel centers as suggested above the output should match that of the ray tracer almost exactly (virtually no visible difference, except at the contours of the spheres). If you stuck to SPHERE_N=20 you should end up with the following result:
To get the positions and colors and so on of the light(s) in the scene you can either make use of the built-in variables in GLSL that carry the information from OpenGL, or you can explicitly pass the shader information using uniform variables (using glUniform). Using the built-in variables is deprecated in v1.30 of GLSL, but in the newest version of GLSL it is part of the compatibility profile. The advantage of using the built-in variables is that you can make your shaders a drop-in replacement for OpenGL lighting (and that it is easier), on the other hand using uniform variables is definitely more flexible.
(Bonus) Implement some other interesting effect using GLSL shaders.
Feel free to use GLSL developer tools for developing your shaders (see the Wikipedia GLSL page for links).
3. Depth-of-field using the accumulation buffer
Depth-of-field is the effect caused by the size of the aperture in cameras, objects that are in-focus are sharp and objects out-of-focus are blurred. In OpenGL (or indeed the ray tracer) we simulate a pin-hole camera with an infinitesimal opening, causing all objects to appear sharp. To get a more life-like appearance we will simulate depth-of-field by drawing the scene multiple times and accumulating the result.
- In your call to
glutInitDisplayMode, also ask for GLUT_ACCUM.
- Refactor your
display function body to do all the drawing (including your calls to glClear, glLoadIdentity, gluLookAt, etc.) in a for-loop which runs from 0 upto (but NOT including) apertureSamples, the number of times you want to render the scene (I recommend at least 8 times). At the end of the for loop you should call glFlush, and glSwapBuffers should come AFTER the for loop (as the very last call in display).
- Use
glClear(GL_ACCUM_BUFFER_BIT) and glAccum to add all renders. You should end up with the same image as before.
- Inside the for-loop displace the x- and y-coordinates of the eye position in your gluLookAt call to follow Vogel's model around the normal eye position in such a way that all points lie within a circle (on the xy-plane,with radius 10) around the normal eye position. Also see this ray tracer assignment. You should end up with something like this (for 16 samples):
Note that the method suggested above to simulate depth of field is not the best possible. For one thing, it would be more correct to skew the view (resulting in a focus plane) instead of doing a slight rotation (which you're effectively doing when perturbing the eye position), which results in a focus point (but as long as the angle is small enough you won't notice). One way of accomplishing this is by using glFrustum instead of gluPerspective.
(Bonus) Implement a more correct form of depth of field, using a shear transform or glFrustum. Take care that you explain why your calculations are correct.
4. (Bonus) 3D meshes
The next step in creating a more interesting scene will be adding 3D models (meshes). We will provide you the code for reading in 3D models (glm.c and glm.h). These two files come from the GLUT examples by Nate Robins and besides code for reading and writing Wavefront OBJ files, these files also contain code for generating smooth normals and drawing the model. The drawing code however uses the old-fashioned immediate mode (glBegin/glEnd pairs) and your task is to modernize this to use vertex buffer objects (VBOs).
The suggested steps to take:
- If you have not done so yet, read documentation on Vertex Arrays and VBOs in the Red Book or online (such as here, here, here, and here).
- Add the files
glm.c and glm.h to your project and modify your Makefile such that this code is compiled and linked to the executable (here is an example of a modified Makefile).
- Add
#include "glm.h" to your source file and revert the gluLookAt and gluPerspective (and optionally glutInitWindowSize) calls to their original form. Also, if you added translations to the code to make sure that it rotates around (200,200,200), remove them. You can keep the phong shading and depth-of-field modifications.
- Look at the code in the
glmDraw(objmodel, GLM_SMOOTH) function (in glm.c to see how the data is organized in the GLMmodel data structure (see also the glm.h file).
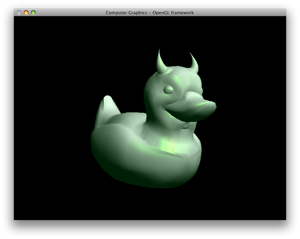
- You can test whether reading the OBJ file works by adding a call to
glmDraw() to your display() function. When loading the model you can use glmUnitize and glmScale (with a scale factor of 2) to get the model in view and at the right scale (the same as your cube). Also, don't forget to let glm generate normals! (Otherwise your lighting will not work.)
- Decide how to (re)organize the data of the 3D model such that it can be stored on the GPU using VBOs and implement a function
glmInitVBO that creates the necessary VBOs for drawing a model. You should minimally support a smoothly shaded model using three vertices per triangle, with each vertex its corresponding vertex normal and one material for the entire object (corresponding to GLM_SMOOTH).
- Create a function
glmDrawVBO() that draws the object using Vertex Buffer Objects. Keep it simple, leave out the material setting parts (i.e., don't use the groups, just draw all triangles) and you may want to stick to smooth rendering using vertex normals.
- Try some OBJ models. Some example models: obj.zip. More OBJ files can be found at INRIA's 3D Meshes Research Database. You can use MeshLab to view and convert models you find there. Feel free to create or modify models yourself using, for example, Blender.
(Bonus) Support rendering of materials, either by specifying one or more additional attributes for each vertex (see glVertexAttribPointer and glBindAttribLocation) or by rendering per group.
(Bonus) Optimize the VBO storage by only storing a vertex as often as is required (that is, if the same vertex, with the same normal, is used in more than triangle it is stored only once).
5. Alternative illumination models in GLSL
Implement Gooch's illumination model (see the Raytracing project) in a GLSL shader.
6. Texture mapping and animation
In this OpenGL assignment you will do some basic texture mapping and some basic animation. We will give you 3 options to implement:
# An animated scene with (at least) three bouncing, textured balls of different sizes.
# An animated scene with at least four rotating planets (i.e., textured spheres) orbiting around a center planet or sun.
# An animated scene of your own choice. Please talk with me first if you want to do this.
- Implement texture mapping using the instructions below.
- (Bonus) Implement simple animation that, for example, let's things bounce around.
As for animation, you can use GLUT's idle() function callback for this. You can use glutGet(GLUT_ELAPSED_TIME) to get the elapsed time.
For texturing the spheres you can use the following step-by-step guide to get started:
- As (to our knowledge)
glutSolidSphere() does not output texture coordinates we will use gluSphere instead. Alternatively you can use the model loading code you already have and a model for a sphere (also note the bonus exercise below). So start from a code base that draws either the scene01 look-alike or a model, in any case it should allow interaction with the scene (rotation).
- If you're using gluSphere, define a global
GLUquadric* quadric, draw spheres using gluSphere(quadric,radius,SPHERE_N,SPHERE_N) instead of glutSphere(radius,SPHERE_N,SPHERE_N) and add the following to your main:
    quadric = gluNewQuadric();
    gluQuadricDrawStyle(quadric, GLU_FILL);
    gluQuadricOrientation(quadric, GLU_OUTSIDE);
    gluQuadricNormals(quadric, GLU_SMOOTH);
    gluQuadricTexture(quadric, GL_TRUE);
- If you're using the model code, instead of your
glmDrawVBO() use the provided glmDraw() with the parameter GLM_TEXTURE. And call glmSpheremapTexture() *after* calling glmVertexNormals().
- Add the files
lodepng.c and lodepng.h (origin) to your project and add #include "lodepng.h" to your main c file (do not forget to add lodepng.o to OBJS or COBJS in your Makefile).
- Add the following function to your c-file:
GLuint initTexture(char* filename)
{
 	   unsigned char* buffer;
 	   unsigned char* image;
 	   size_t buffersize, imagesize;
 	   GLuint texName;
 	   LodePNG_Decoder decoder;

 	   LodePNG_loadFile(&buffer, &buffersize, filename);
 	   LodePNG_Decoder_init(&decoder);
 	   decoder.infoRaw.color.colorType = 6; /* Load image as RGBA */
 	   LodePNG_decode(&decoder, &image, &imagesize, buffer, buffersize);
 	   if(decoder.error) {
 	      printf("Error reading in png image: %d\n", decoder.error);
 	      exit(1);
 	   } else {
 	      glPixelStorei(GL_UNPACK_ALIGNMENT,1);
 	      glGenTextures(1,&texName);
 	      glBindTexture(GL_TEXTURE_2D,texName);
 	      glTexParameteri(GL_TEXTURE_2D,GL_TEXTURE_WRAP_S,GL_REPEAT);
 	      glTexParameteri(GL_TEXTURE_2D,GL_TEXTURE_WRAP_T,GL_REPEAT);
 	      glTexParameteri(GL_TEXTURE_2D,GL_TEXTURE_MAG_FILTER,GL_LINEAR);
 	      glTexParameteri(GL_TEXTURE_2D,GL_TEXTURE_MIN_FILTER,GL_LINEAR);
 	      glTexImage2D(GL_TEXTURE_2D,0,GL_RGBA,decoder.infoPng.width,
 	                   decoder.infoPng.height,0, GL_RGBA,GL_UNSIGNED_BYTE,image);
 	   }
 	   return texName;
- }
- Use a global variable (say
GLuint myTexture;) and assign it the outcome of initTexture() somewhere in the initialization phase (e.g., myTexture = initTexture("earth.png");).
- In your main function, put the following line (this makes sure specular highlights do not use the texture color):
glLightModeli(GL_LIGHT_MODEL_COLOR_CONTROL,GL_SEPARATE_SPECULAR_COLOR);
- In your display function, before the
gluSphere or glmDraw() call, add the following lines:
  	glEnable(GL_TEXTURE_2D);
  	glTexEnvf(GL_TEXTURE_ENV,GL_TEXTURE_ENV_MODE,GL_MODULATE);
  	glBindTexture(GL_TEXTURE_2D,myTexture);
- And after the
glmDraw() call, add the following line:
glDisable(GL_TEXTURE_2D);
- Make sure you have disabled any custom shaders at this point (unless you've already modified them to support textures).
- Now compile and run. If everything is correct, you should see a textured ball.
- If you used gluSphere you may notice that you are looking at earth from the "wrong" end and that the earth is mirrored, this is because of conflicting conventions (in an image file y=0 at the top of the image, instead of at the bottom). You can fix this by putting
glScaled(1,1,-1) directly before any gluSphere calls.
- If you used the sphere model (instead of gluSphere) you will notice that if you use an "earth" texture everything appears twice. So if you would like to do the orbiting planets assignment you should change the function
glmSphereMapTexture() (look at your texture-mapping code for the Raytracer).
Also include your coolest result(s) (either from the Raytracer or the OpenGL project) in the archive that you hand in. These results will be used for the gallery page of this year. You can use images (renders & screenshots), but video's are allowed too :) Please don't hide these files too deep in your archive, so that I can easily spot them.
Some other things to try:
- (Bonus) Instead of using gluSphere or the OBJ sphere, write your own sphere function.
- (Bonus) Implement texture mapping using shaders.
- (Bonus) Implement the texture coordinates by adapting your
glmDrawVBO() to include texture coordinates besides vertex positions and normals.


